Saturday, September 02, 2006

PVC Greenhouse: The Ribs

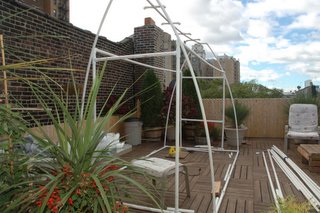
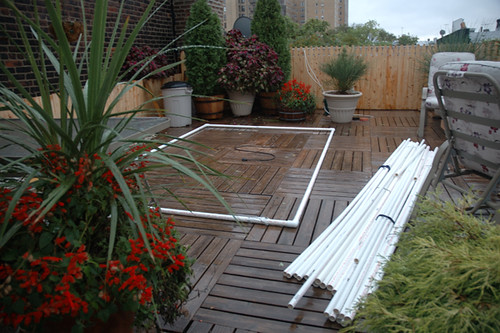
Once the square support and the back wall are assembled, it become pretty obvious how to attach the ribs. After all, we've done the work of aligning the 45 degree connectors on the ridge pole and the T - connectors on the base.

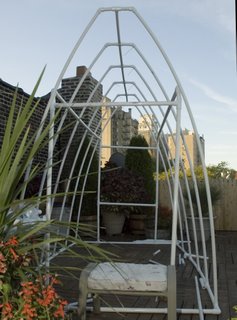
Grab a ladder and start adding ribs between the ridge pole and the base. If you plan to take your greenhouse down in the summer (or ever!) do not glue the ribs. Friction fit only at top and bottom. When you are done it should look like this. (that long horizontal bend intentional at this point)
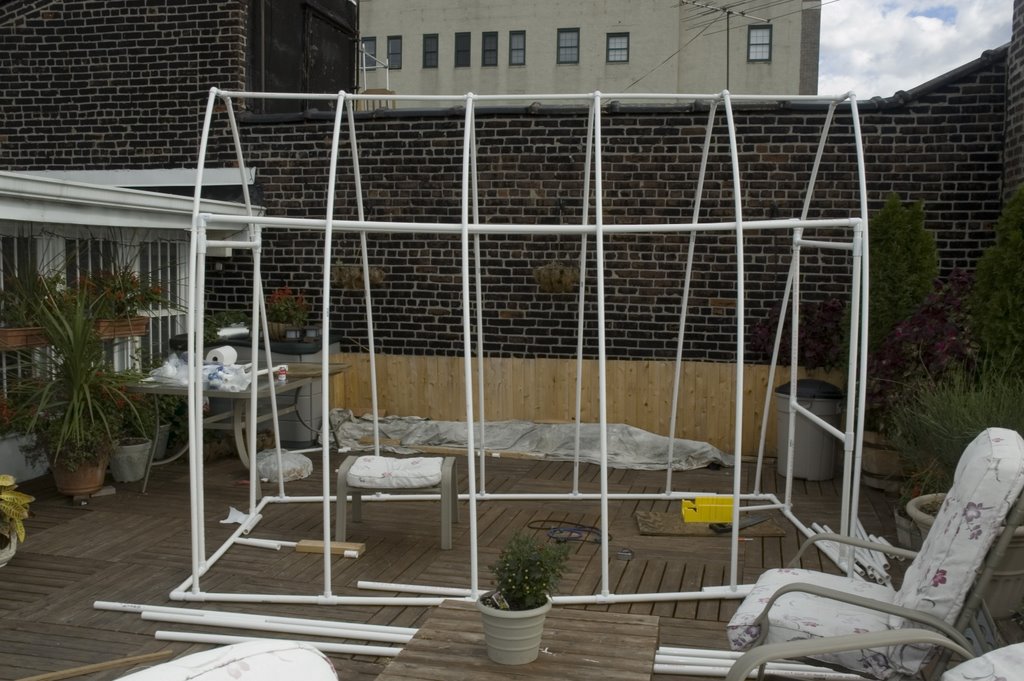


Since attaching the ribs is so easy this step is more about tips and tricks. First, without some kind of fastener the ribs would pop out at the first big wind of the season. To attach at the top and base I chose plastic wire ties. I drilled a small hole through the 45 degree fastener and the rib pole. Be sure there is enough overlap that the hole can go cleanly through both. Once you have the hole slip the wire tie through and secure. See image below.
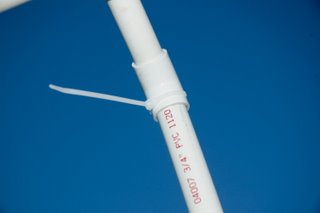
Repeat top and bottom for all poles.

You should also attach the first and last pairs to the square supports be just wrapping them together with more ties (no drilling needed).

Remember that horizontal droop we saw? Well you should also attach the rib p[airs to the long horizontal bars...Again with wire ties(again no drilling).

Here's a pretty good shot of the completed frame. See the wire tie loose ends on the top right poles? Trim those extra bits off before we wrap in the the next step.


Tags: , ,

Saturday, May 06, 2006

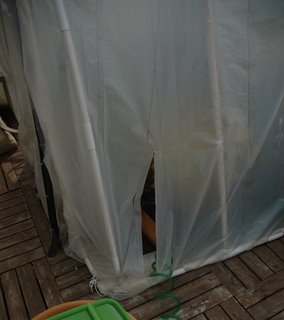
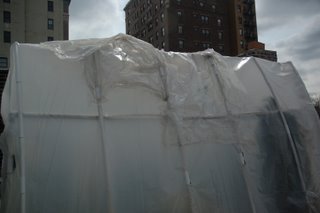
Here are a few "blow outs" my greenhouse experienced over the winter. I captured the images them just before taking down the greenhouse in March.


The above is a pretty big tear in the plastic in the lower right hand front corner. It came late in the season so, as you can see, I just used it as a way to easily run my watering hose into the greenhouse.


The image above shows how I repaired two large tears. One was between rib 2 and 3 and the other between 3 and 4. I took tears in the structure rook very seriously because of the potential loss of heat. The repair strategy was to lay new large sections of tarp and anchor those pieces to the ribs. As you can see it was pretty ugly. However it was very effective.

I'll post some other 'blow outs' shortly and include them in a "How to Prevent" and "How to Repair" sections.

Tags: , ,

Sunday, April 23, 2006

Spring is here: Pictures from '06 Blizzard


Spring has arrived in New York. Here is an over due picture from our '06 Blizzard. Greenhouse, plants, and shrubs all survived!!

I will be finishing the step by step guide shortly. I also have some images of greenhouse wear and tear form the long winter.

My greenhouse is dismantled and stowed neatly away fro the nice weather. I have images and tips for the whole thing.


Tags: , ,

Saturday, December 10, 2005

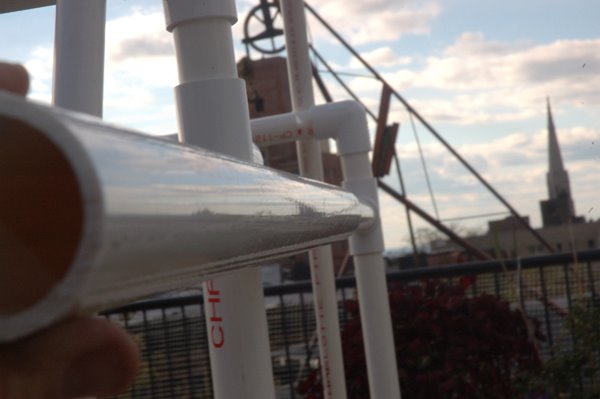
Images in PVC


Finally put the finishing touches on the my door design. Expect some step by step posts this week.

Pictured here is a just a shot I took during construction. Nice fall day. The block and tackle in distance was some roof work from a few doors down. "Old First" church steeple in deep background

Tags: , ,

Wednesday, November 30, 2005

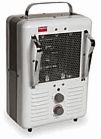
My heater arrived


The heater I ordered just in time. It has been unseasonably warm in NY lately. It seems as if it is going to drop below freezing every night for a good ong while.

I bought a small heater from littlegreenhouse.com. I had a great buying experience. I call it 'small' because the 'heater calculator' on the littlegreenhouse site reommended a heater about twice the size. I was a little nervous about 'over doing' it so I went for a less powerful unit. They recommended something that could kick out more than 7,000 BTUs. This one delivers more in the range of 5,000. Any thoughts? Advice gladly accepted.


The description of the heater is below.


Dayton 120v Electric Heater
This 5,120 BTU Dayton heater is an economical option for heating small greenhouses. Features: multiple heat settings (1300/1500 watts) and "fan only" setting, built-in dial thermostat, safety tip-over and overheat protection, quiet circulation fan which distributes heat evenly throughout structure, long-lasting permanently lubricated motor, finger-proof intake and discharge safety grills, and 20-guage steel housing with scratch-resistant, baked-on, enamel finish. Measures: 16"H x 10"W x 8"D. Requires 110/120 volt outlet. 12.5 amps


Tags: , ,

Monday, November 28, 2005

PVC Greenhouse: Square Support Structure


While it is really not sqaure, it does have a lot of right angles (coompared to the ribs) so that's why I call it the 'sqaure' structure.

The square support structure is critical to the stability of the greenhouse. Some recent weather in my area had winds and gusts exceeding 50 MPH. So far this appears to be no problem. The ribs will flex nicely, taking and absorbing the wind. The square structure held firm with little sway.


Let's Begin

For starters, friction fit the square structure for now. Do not glue since there will be modifcations for the door after it is assembled.

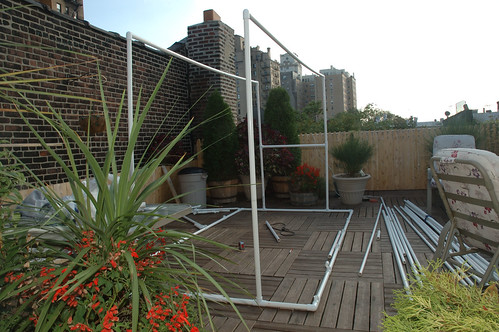
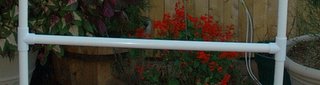
Cut four 6-foot length of 1" PVC. These four poles will be the uprights. The rear wall of the greenhouse is not a door. A horizontal cross bar will add some necessary support to that wall. To add that bar, cut two of the 6-foot length in half. Insert a 1" T into each with the short open portions of the T facing each other. Cut a 3-foot piece of 1"pipe for the horizontal bar. Insert into the T-fittings to form and 'H' shaped structure. See close up image below


Cap the top of each up right with and elbow with the open end facing the upright on furthest opposite end of the greenhouse. Measure the distance between the uprights. When we started, this was going to be 10 feet. Due to the 'spread' in the base (discussed here in "PVC is not an exact science") this may be more like 11 feet. If you insert the 10 (or 11 ft.) lengths you will have a structure that resmebles the photo at the very top of this post.

Good so far? Let's continue.

(I've seen PVC plans that recommend inserting rigid metal pipes into the long horizontal lengths of the square structure. This seemed especially key if you want to hang planters. I'd have to agree considering they bend slightly under their own weight. Planters would seriously bow this without added support)

More Horizontal support
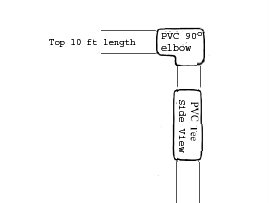
The front and rear walls need a 3 foot horizontal bar at the top of the uprights. This is tricky since the top of the uprights already have an elbow and that is used for the 10 foot supports. The key here is to make a small one inch cut in each upright, insert a T fitting between the ramainder of the upright and the one inch cutting, and cap with the elbows. See image below.


The above is a side view of one upright. Below is an image of the same from another angle.

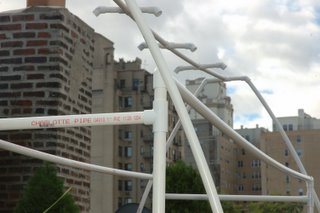
You can see how the upright has a horizontal bar at the top but also the elbow. Below is a pretty good shot of th completed structure. (My image has a few ribs already added. We'll get to that in the next step)


Tags: , ,

Thursday, November 17, 2005

Image: Greenhouse filled


I loaded the greenhouse up last weekend with all my planters. I'm glad they are in nice and snug but not a lot of extra room. Considering that I am definitely buy new pants and shrubs this spring, I may need a larger greenhouse next year.

We'll see.

Monday, October 17, 2005

How I built a PVC Greenhouse


COME ALL, COME ALL, SEE HERE THE START OF THE AMAZING GRANDIOSE STUPENDOUS ALL PVC ROOF DECK GREENHOUSE!!!!!


Last year I overwintered my trees and shrubs by simply packing them with additional mulch and pushing them against the building where there was a slight overhang. They didn't do too well.

Pictured here is the start of my Greenhouse. I am planning a 6' x 8' A-Frame that will be about 9' high at its peak. It will have a door at one end that will be hinged at the top and open like a garage door. It is based on the plans for this wood/pvc combo greenhouse. I've adapted that in-garden design for my own all-pvc roof deck concept.

I have 270 feet of PVC pipe, about 50 pipe fittings (elbows, tees, crosses) for the joints, metals screws, some wire ties, and PVC pipe glue ready to go.

The goal is to have a sturdy structure, that is light weight, as air-tight as possible, that can be broken down in the spring and stored behind the fence out of view.

Updates soon


Tags: , ,