Sunday, January 31, 2010

PVC Greenhouse: Pipe Fittings


Plan your pipe fittings
I found it helpful to draw (and redraw) my proposed greenhouse. Only through this kind of visualization was I able to build my inventory list.


For this project you will need many different kinds of PVC pipe fitting. For my project it looked like

24 - 45 degree elbos 3/4 inch
4 - cross pipe fitting 3/4 inch
2 - T fittinggs 3/4 inch

24 - T fittings for 3/4 inch -1 inch
24 - 90 degree elbow 1 inch
4 - T fitting 1 inch

Remember that the T-pipe fittind along the base ahve to be "3/4 inch -1 inch T pipe fittings". This indicates that a 3/4 inch pvc pipe (the rib) will be joined to 1 inch PVC pipes (the base)

Buy a few more than you need of all sizes
They are cheap and it will allow for mistakes and adjustments along the way. Keep them in good shape and return the extras. T's are especiall helpful because you add a cross-support anywhere in your square structure where you want a bit more firmness.

Don't worry about the above counts. I will post a complete project manifest once my Greenhouse is complete


Tags: , ,

Saturday, January 30, 2010

PVC Greenhouse: The Base


Okay, so enough talk. Let's build!

The Base
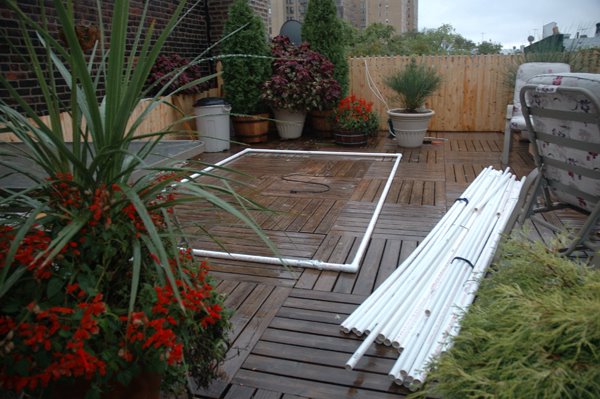
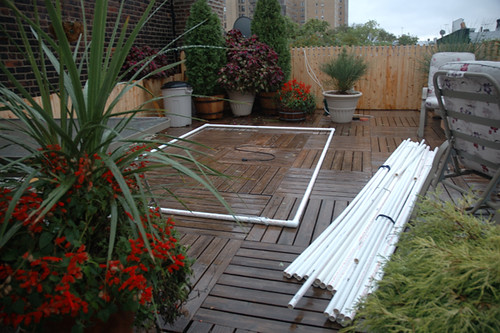
The base is 10' x 5' of 1'' pipe. My PVC came in 10 foot lengths so you can layout the base with just three pieces of pipe and cutting just one 10 foot pipe in half. After the 5' lengths are cut, layout the base on the ground Use elbow fitting at the corners if you want and get a feel for the size of your new greenhouse. Visualize the amount of space it will take up and whether you plants will fit. Its pretty big using my dimension so I hope you like it. (Building is half the fun so you could just make a second one if you need more space :)


Cutting for the ribs
The 10' lengths of pipe need to be fitted every two feet with a 1" - 3/4" inch T fitting. You need to make 4 cuts in the 10 foot lengths. I wanted the sides to be nice and even. You also want the sides to be even with the ridge beam pipe. (Ridge beam is a term for the center top most beam that wooden rafter attach to in home or barn construction.)

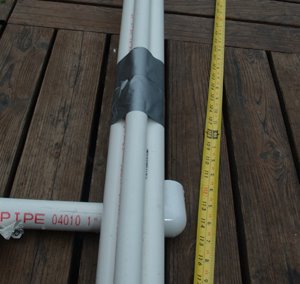
To keep things even, I duct taped the two 1" pipes and the one 3/4" ridge beam pipe together at various point and cut them at the same time I numbered them to keep things in order. (see images)


Reassemble the base with T-fittings
Insert a 1" to 3/4 " T pipe fitting in connecting the 5 pieces of 1" inch pipe and a T fitting on each end. You'll quickly notice that these length need to end in elbows and not T- fittings if the base is ever to reform as a square. I simple cut 1" of pipe off each end and used it as a connector between the elbows and the T. So what you end up with is E-T-T-T-T-T-T-E for each long side where E=elbow and T=T.

The short sides of the base

Take the two shorter 5 foot lengths of 1" pipe and tape them together. Cut 1 foot off of each end.
Connect each piece with 1" T. You can connect these lengths to the elbows on the 10 foot lengths and you base is loosely fitted together but basically complete.

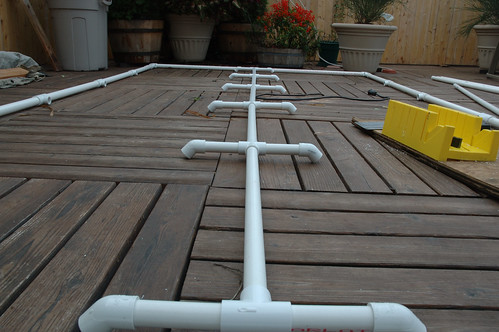
Here is how it looks with the fittings

Ignore the Ridge Beam pole in the middle. I'll cover that next.


Tags: , ,

Friday, January 29, 2010

PVC Greenhouse: Ridge Beam


Ridge Beam
Assembling the ridge beam (and rafters) was one of the most satisfying parts of this project.

The hard part:
Assembling the parts is rather straight forward. However, when it comes time to glue the parts together it is imperative that all the T's and the X's are on the same plane. In other words, the fully assembled ridge beam, together with the fittings, should rest flat when placed on a flat surface. This is key, because without the fitting laying flat on the same plane, one or more ribs, when attached, will be flying off too wide or tucked in too narrowly to be uniform. Don't worry. I provide tips down below to help gurantee your success.

Ridge Beam:
You begin with the 3/4" 10 foot pole which is now cut into 5 pieces. Add a 3/4" T on the end of part number 1 with the pole being the center of the T. Then connect part 1 to part 2 with a 3/4" cross fitting keeping the pole straight. Connect all the other parts with cross fittings. For the last piece, cap it with a T on the end like you did for part one. The result is something that is friction fit together and looks like this:

I--+--+--+--+--I
Now let's glue the part together.
PVC bonding glue looks and smells like rubber cement you use in crafts. DO NOT BE FOOLED. When used to assemble PVC pipe and fitting it very hard after 5 seconds and rock hard and virtually unmoveable in 10 seconds. Trying to undo a glued fitting will prabably crack the fitting. So when it is time to glue, be sure and be quick.
Glue the T fitting to part one by running the PVC glue brush around the inside of the fitting and the outside of the pole. Push the two together. This one is easy. Use it to practice and get a feel for gluing PVC. Use a wood block or a 10 inch piece of PVC pipe as a hammer to really force them togther. Don't slam too hard and don't hammer aginst your wooden deck unless you want a lot of round gouges in your deck surface. ( Also, don't use a real hammer, it will crack the PVC. )
So here is how you keep all the fitting aligned while gluing
1. You now have ththe T and pipe part 1 glued together...


2. And you want to add a cross like the image below BUT the T and and cross have to be perefctly flat on the same plane. So...


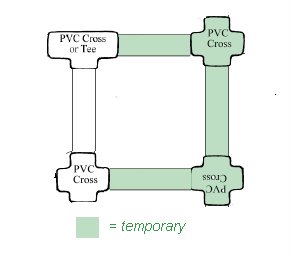
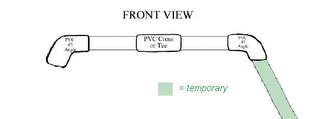
3. The strategy is called "make a square" strategy. You will connect additional pipes and crosses to the parts you will glue so that you can force them to be squarly aligned. (See image below.) All of the parts you add will just be friction fit. When you apply glue to the cross and the pipe you will have the leverage of the temporary pipe and fitings to force your glued parts into square. Your square could twist so placing it on a flat surface before the glue sets will help as well.


Repeat for Ridge Beam section 2 through 5 ending with a T fitting on the end of 5.


When you are done you will have this only it will be about 10' 6" long


Tags: , ,

Thursday, January 28, 2010

PVC Greenhouse: Rafters


Adding the rafters is a pretty simple step. The rafters are 4" long 3/4" piece of pipe attached to the ridge beam fittings. Once complete you will have a center support structure that looks like the image to the left.

Let's get started.

Cut 12 four inch sections of 3/4" pipe. These are your 'rafters.' You can attach and glue these to the ridge beam fittings right down the line. Use a piece of wood or pipe to really set these in tight.

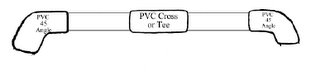
This task is complete when you add 45 degree pipe fittings to each rafter. The 45 degree fitting should be pointed downwards. See image below. This is front end view of the T fitting on the ridge beam.


It is really important that 45 degree fittings are all aligned correctly. When it is time to set these with glue I recommend using a 3/4" piece of pipe in the open end to gain leverage as you twist the 45 degree elbows on. This will give you a large handle rather than just grabbing the fitting. See image below

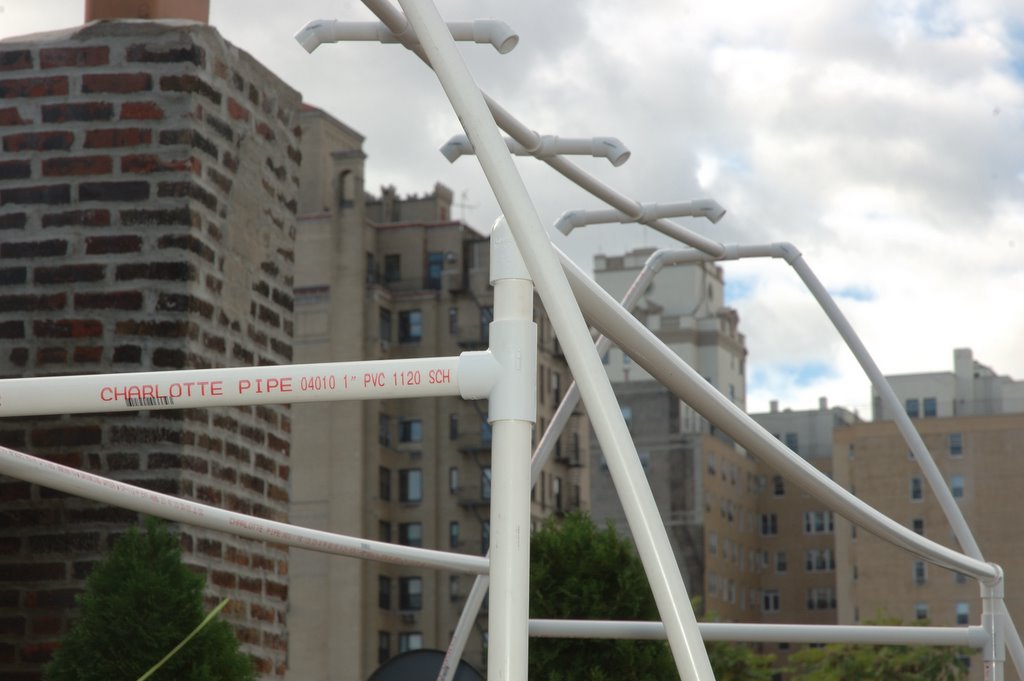
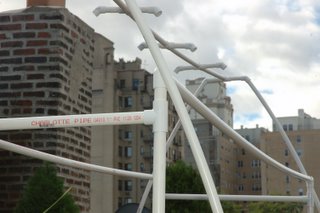
That's it. You're done. Here's an image of the ridge beam and rafters high above my very 'in progress" greenhouse. (Only 4 ribs were attached at this point which is why it appears a bit curvy)


Tags: , ,

Saturday, September 23, 2006

PVC Greenhouse: Wrapping the greenhouse

So now you have the frame complete (except for the door which will come later). You are ready to wrap you greenhouse.

The supplies I used were:
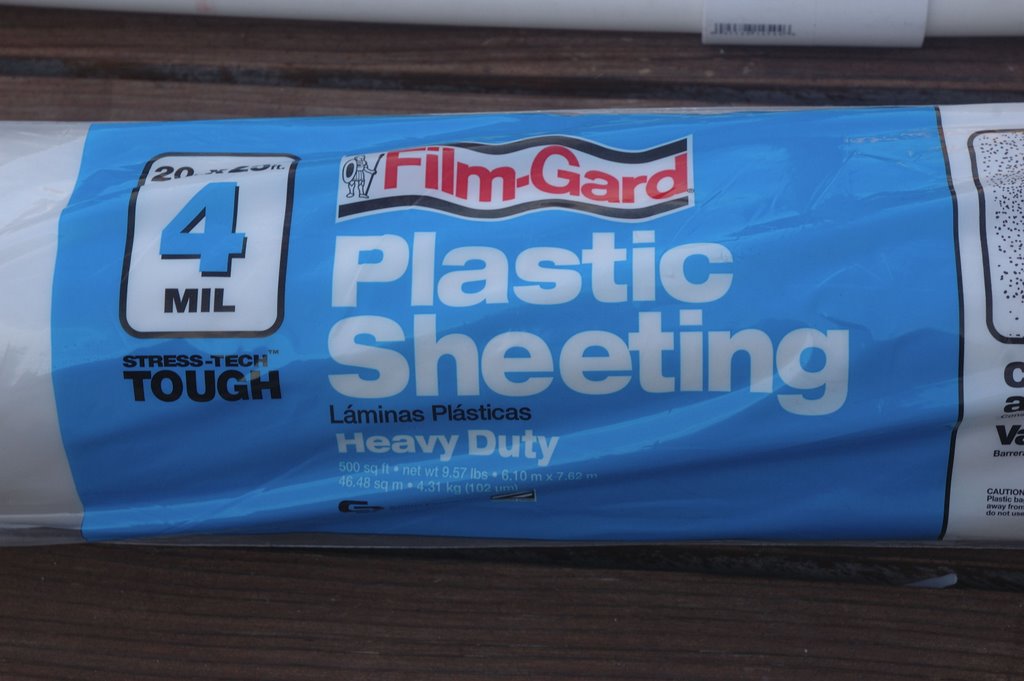
- 1 - 20' x 25' - 4 mil plastic sheeting (note: this year I'm going for 5 mil)
- about 50 snapclamps (various sizes)

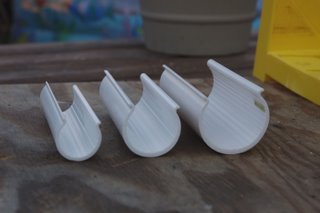
Snap clamps, pictured below, are these need litte device that are used to clamp tarp and plastic sheeting to pvc pipe.
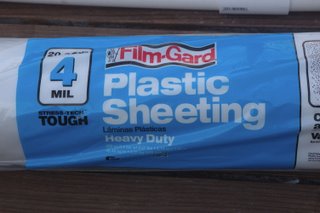


So, before you unroll your huge plastic sheet makes sure you either have a non-windy day or a buddy. The thing will blow around and you'll never get that big thing onto you frame.
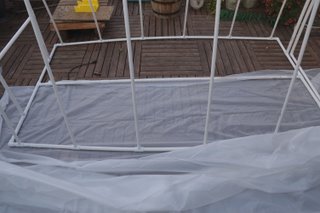
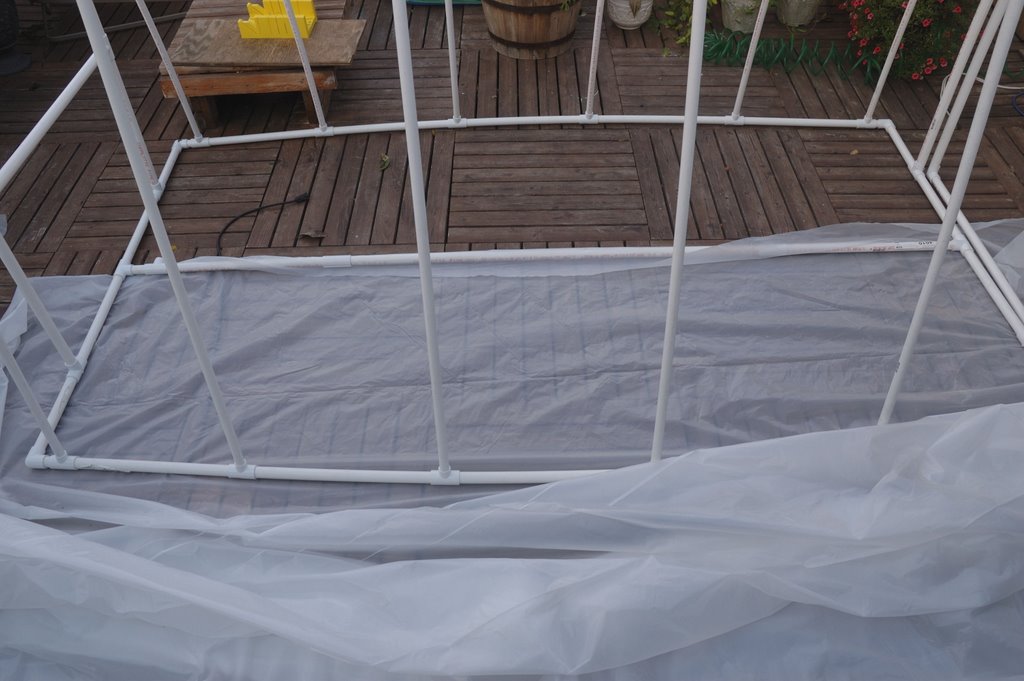
Open up your tarp. Take one edge and insert it under the greenhouse to the half point. Now take the tarp and roll it up one side of the green house, over the top and back down the other side.Tuck the edge under the greenhouse. Have the two edges meet in the middle under the greenhouse.


You now have the plastic sheeting forming a big tube around the greenhouse with plenty of slack on both ends. You can now attaching the plastic sheet to the rib poles using the correct sized snapclamps. You can place about 3 per rib. Start by the door, completing and entire pole on ight then left, and work your way back. Two important tips: First, if the tarp is too tight applying the snapclamps can tear the plastic. The tarp has to be loose enough that is can wrap around each rib then add the clamp. The second is that winter winds will put stress on you sheets where they meet the clamps. Consider adding a small patch of duct tape to the sheeting where it meets the clamp. (I have never done this but will for this winter)
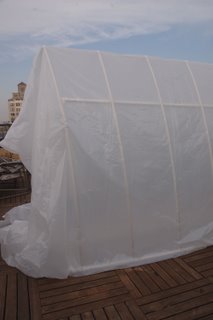
Now, you have to wrap the end of the trap around the frame. This takes a bit of creativity but is like wrapping a giant birthday present where the tarp is wrapping paper. Standing outside the greenhouse, I took all the excess tarp from the right side and wrapped it around the rear until it met the the leftside. Now bring the left excess over to the right. make sure the trap is alway laying in such a way that rain will run off, and not into, the folds of your tarp. Secure the sheeting strategically with more snap clamps. Tuck the extra at the bottom under the greenhouse and also secure with snapclamps.

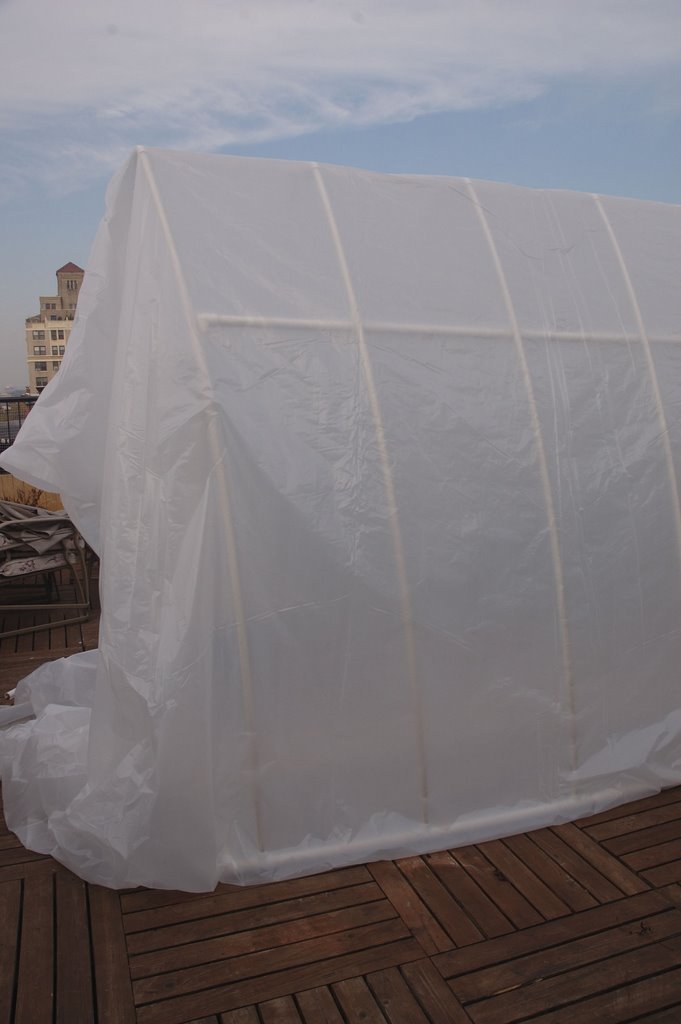
The method above gives you overlapping layers of plastic sheeting. Not as pretty as if you cut the sheet to fit perefctly but it lasted all winter and was quite air tight.

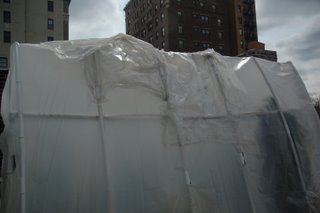
Take your time and you'll end up with something like this:
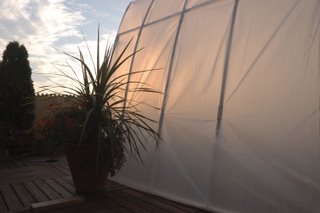


(Nice picture...right? truth is, that sheet is wrapped a bit to tight and did not leave enough slack around the snap clamps. I has plenty of tearing that year and learned to leave the sheeting a little more baggy)


Tags: , ,

Saturday, September 02, 2006

PVC Greenhouse: The Ribs

Once the square support and the back wall are assembled, it become pretty obvious how to attach the ribs. After all, we've done the work of aligning the 45 degree connectors on the ridge pole and the T - connectors on the base.

Grab a ladder and start adding ribs between the ridge pole and the base. If you plan to take your greenhouse down in the summer (or ever!) do not glue the ribs. Friction fit only at top and bottom. When you are done it should look like this. (that long horizontal bend intentional at this point)


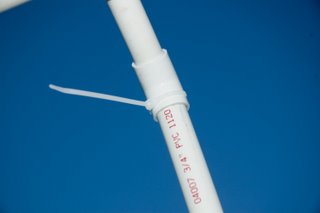
Since attaching the ribs is so easy this step is more about tips and tricks. First, without some kind of fastener the ribs would pop out at the first big wind of the season. To attach at the top and base I chose plastic wire ties. I drilled a small hole through the 45 degree fastener and the rib pole. Be sure there is enough overlap that the hole can go cleanly through both. Once you have the hole slip the wire tie through and secure. See image below.

Repeat top and bottom for all poles.

You should also attach the first and last pairs to the square supports be just wrapping them together with more ties (no drilling needed).

Remember that horizontal droop we saw? Well you should also attach the rib p[airs to the long horizontal bars...Again with wire ties(again no drilling).

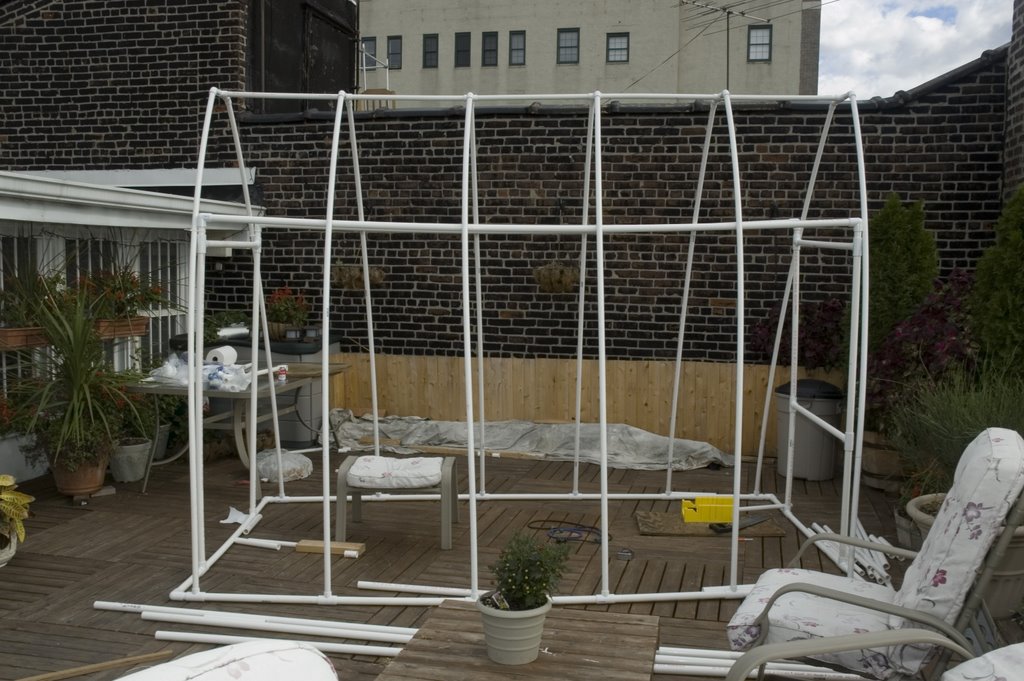
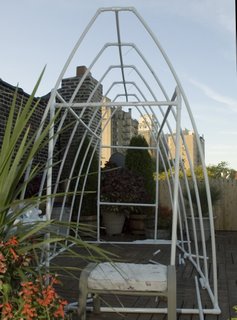
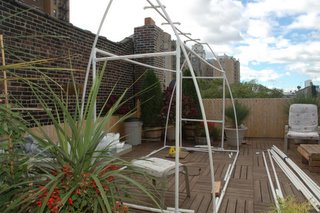
Here's a pretty good shot of the completed frame. See the wire tie loose ends on the top right poles? Trim those extra bits off before we wrap in the the next step.


Tags: , ,

Saturday, May 06, 2006

Here are a few "blow outs" my greenhouse experienced over the winter. I captured the images them just before taking down the greenhouse in March.


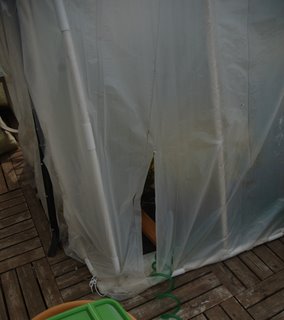
The above is a pretty big tear in the plastic in the lower right hand front corner. It came late in the season so, as you can see, I just used it as a way to easily run my watering hose into the greenhouse.


The image above shows how I repaired two large tears. One was between rib 2 and 3 and the other between 3 and 4. I took tears in the structure rook very seriously because of the potential loss of heat. The repair strategy was to lay new large sections of tarp and anchor those pieces to the ribs. As you can see it was pretty ugly. However it was very effective.

I'll post some other 'blow outs' shortly and include them in a "How to Prevent" and "How to Repair" sections.

Tags: , ,

Sunday, April 23, 2006

Spring is here: Pictures from '06 Blizzard


Spring has arrived in New York. Here is an over due picture from our '06 Blizzard. Greenhouse, plants, and shrubs all survived!!

I will be finishing the step by step guide shortly. I also have some images of greenhouse wear and tear form the long winter.

My greenhouse is dismantled and stowed neatly away fro the nice weather. I have images and tips for the whole thing.


Tags: , ,

Saturday, December 10, 2005

Images in PVC


Finally put the finishing touches on the my door design. Expect some step by step posts this week.

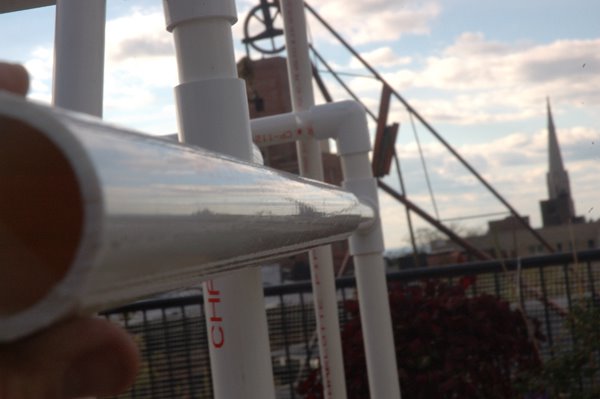
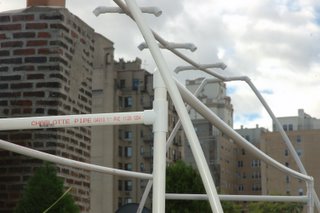
Pictured here is a just a shot I took during construction. Nice fall day. The block and tackle in distance was some roof work from a few doors down. "Old First" church steeple in deep background

Tags: , ,

Wednesday, November 30, 2005

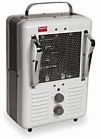
My heater arrived


The heater I ordered just in time. It has been unseasonably warm in NY lately. It seems as if it is going to drop below freezing every night for a good ong while.

I bought a small heater from littlegreenhouse.com. I had a great buying experience. I call it 'small' because the 'heater calculator' on the littlegreenhouse site reommended a heater about twice the size. I was a little nervous about 'over doing' it so I went for a less powerful unit. They recommended something that could kick out more than 7,000 BTUs. This one delivers more in the range of 5,000. Any thoughts? Advice gladly accepted.


The description of the heater is below.


Dayton 120v Electric Heater
This 5,120 BTU Dayton heater is an economical option for heating small greenhouses. Features: multiple heat settings (1300/1500 watts) and "fan only" setting, built-in dial thermostat, safety tip-over and overheat protection, quiet circulation fan which distributes heat evenly throughout structure, long-lasting permanently lubricated motor, finger-proof intake and discharge safety grills, and 20-guage steel housing with scratch-resistant, baked-on, enamel finish. Measures: 16"H x 10"W x 8"D. Requires 110/120 volt outlet. 12.5 amps


Tags: , ,

Monday, November 28, 2005

PVC Greenhouse: Square Support Structure


While it is really not sqaure, it does have a lot of right angles (coompared to the ribs) so that's why I call it the 'sqaure' structure.

The square support structure is critical to the stability of the greenhouse. Some recent weather in my area had winds and gusts exceeding 50 MPH. So far this appears to be no problem. The ribs will flex nicely, taking and absorbing the wind. The square structure held firm with little sway.


Let's Begin

For starters, friction fit the square structure for now. Do not glue since there will be modifcations for the door after it is assembled.

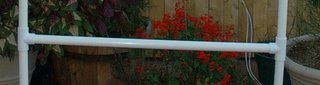
Cut four 6-foot length of 1" PVC. These four poles will be the uprights. The rear wall of the greenhouse is not a door. A horizontal cross bar will add some necessary support to that wall. To add that bar, cut two of the 6-foot length in half. Insert a 1" T into each with the short open portions of the T facing each other. Cut a 3-foot piece of 1"pipe for the horizontal bar. Insert into the T-fittings to form and 'H' shaped structure. See close up image below


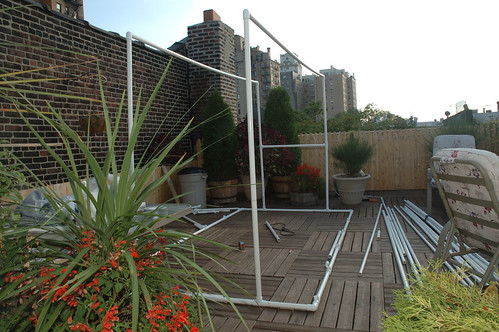
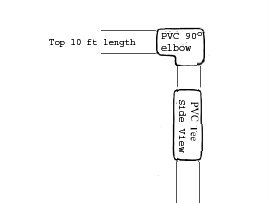
Cap the top of each up right with and elbow with the open end facing the upright on furthest opposite end of the greenhouse. Measure the distance between the uprights. When we started, this was going to be 10 feet. Due to the 'spread' in the base (discussed here in "PVC is not an exact science") this may be more like 11 feet. If you insert the 10 (or 11 ft.) lengths you will have a structure that resmebles the photo at the very top of this post.

Good so far? Let's continue.

(I've seen PVC plans that recommend inserting rigid metal pipes into the long horizontal lengths of the square structure. This seemed especially key if you want to hang planters. I'd have to agree considering they bend slightly under their own weight. Planters would seriously bow this without added support)

More Horizontal support
The front and rear walls need a 3 foot horizontal bar at the top of the uprights. This is tricky since the top of the uprights already have an elbow and that is used for the 10 foot supports. The key here is to make a small one inch cut in each upright, insert a T fitting between the ramainder of the upright and the one inch cutting, and cap with the elbows. See image below.


The above is a side view of one upright. Below is an image of the same from another angle.

You can see how the upright has a horizontal bar at the top but also the elbow. Below is a pretty good shot of th completed structure. (My image has a few ribs already added. We'll get to that in the next step)


Tags: , ,

Thursday, November 17, 2005

Image: Greenhouse filled


I loaded the greenhouse up last weekend with all my planters. I'm glad they are in nice and snug but not a lot of extra room. Considering that I am definitely buy new pants and shrubs this spring, I may need a larger greenhouse next year.

We'll see.

Monday, October 17, 2005

How I built a PVC Greenhouse


COME ALL, COME ALL, SEE HERE THE START OF THE AMAZING GRANDIOSE STUPENDOUS ALL PVC ROOF DECK GREENHOUSE!!!!!


Last year I overwintered my trees and shrubs by simply packing them with additional mulch and pushing them against the building where there was a slight overhang. They didn't do too well.

Pictured here is the start of my Greenhouse. I am planning a 6' x 8' A-Frame that will be about 9' high at its peak. It will have a door at one end that will be hinged at the top and open like a garage door. It is based on the plans for this wood/pvc combo greenhouse. I've adapted that in-garden design for my own all-pvc roof deck concept.

I have 270 feet of PVC pipe, about 50 pipe fittings (elbows, tees, crosses) for the joints, metals screws, some wire ties, and PVC pipe glue ready to go.

The goal is to have a sturdy structure, that is light weight, as air-tight as possible, that can be broken down in the spring and stored behind the fence out of view.

Updates soon


Tags: , ,