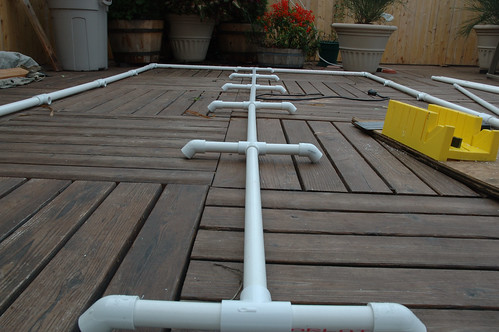
Adding the rafters is a pretty simple step. The rafters are 4" long 3/4" piece of pipe attached to the ridge beam fittings. Once complete you will have a center support structure that looks like the image to the left.
Let's get started.
Cut 12 four inch sections of 3/4" pipe. These are your 'rafters.' You can attach and glue these to the ridge beam fittings right down the line. Use a piece of wood or pipe to really set these in tight.
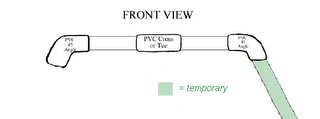
This task is complete when you add 45 degree pipe fittings to each rafter. The 45 degree fitting should be pointed downwards. See image below. This is front end view of the T fitting on the ridge beam.

It is really important that 45 degree fittings are all aligned correctly. When it is time to set these with glue I recommend using a 3/4" piece of pipe in the open end to gain leverage as you twist the 45 degree elbows on. This will give you a large handle rather than just grabbing the fitting. See image below
That's it. You're done. Here's an image of the ridge beam and rafters high above my very 'in progress" greenhouse. (Only 4 ribs were attached at this point which is why it appears a bit curvy)

Tags: greenhouse, pvc, roof deck
2 comments:
Thank you for the information. I have been experimenting and there didn't seem to be a right or a wrong way. What you have done in you photo's is exactly what I ended up with.
I am in windy area and I hope it holds out.
It's a great idea to established a greenhouse and conservatory.
Post a Comment